If you’re interested in building your own outdoor arena then congratulations, you’ve found a great place to start. I recently built an outdoor arena, and on a steep hill no less, and so I understand how hard it is to find good information on the internet about what to expect, what kind of footing to use, what costs to expect, what fencing to use, where to put it, and so forth and so on. So I wanted to take the time to break down my experience in hopes that it will help other people who have to wade through the murk and generalized information that I did before I started my own outdoor arena journey. Here’s my experience and I hope that it helps make your foray into this territory seem less scary and more tangible.
Budget
This is probably the biggest obstacle you will face when you decide to build an arena. The cost of your arena will depend on a number of factors but the ones that I found to be the most influential are: size, placement and footing. Whatever you plan to spend on your arena add at least 25% to that amount for unexpected issues (rocks, drainage, dirt removal, grading problems, fence removal/changes) that are certain to arise when you start. This will give you options on how to tackle those issues, of which you’re sure to find several, instead of having to accept a mediocre solution or halt your progress completely. There’s nothing more frustrating than having an arena you cannot ride in.
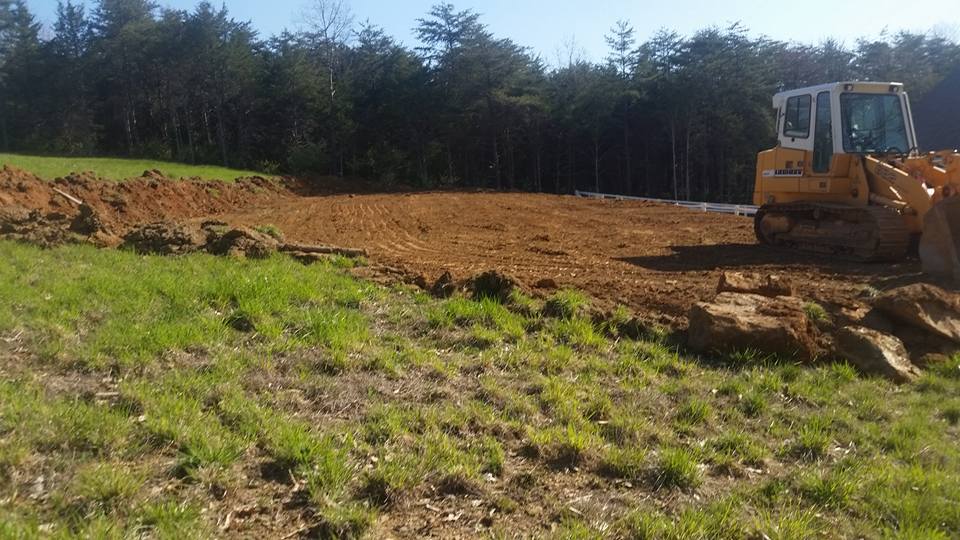
For example, my arena was being built onto the side of the hill so I knew it was likely we would run into rocks which meant paying extra to break them up, jack hammer them or even blast them out. Luckily we were able to break them up with a backhoe but it was an extra $400 just to move the equipment to my property and several thousand in labor to remove and re-grade once the rocks had been broken down. In addition, this extra grading resulted in having to take down fencing (and pay to put it back up), extending the drain pipe for my wash stall (so they could move dirt over it for grading), moving more dirt off of the arena site which caused him to hit the electric down to the barn by accident and re-locating the horses to a friends house for 2 weeks while the construction was under way because with the fencing down I had no pastures to keep them in. This one rock issue took the entirety of my 25% unexpected problems budget and it triggered this chain of other issues.
My Advice
If you want to be on the safe side, double whatever your budget is and plan for issues to come up that will set you back more than what you were planning to spend…. you won’t regret it later.
Placement
This is one of the hardest decisions you’ll face. Sometimes where you want to put an arena isn’t necessarily the best place, and other times it’s the more expensive option but it may be the only place you have if your space is limited. My best recommendation is to put your arena at the highest and flattest point in your property that you can feasibly put it, the lower the elevation the more issues you’ll have with drainage. The flatter the area is the less costs you’ll have in grading and removing dirt and the less dirt you move the less chance you have of hitting rock or running into other issues. For me, this meant putting my arena into the side of a hill because with my limited space I would have to sacrifice my best pasture (of which I don’t have a lot to begin with) to get a cheaper arena placement but it also had a lower elevation which is more prone to getting boggy when there’s lots of rain in the spring. So I made the tough decision to go with a more expensive option because it will be the cheaper option in the long run since I won’t be loosing my best pasture and have to then supplement hay year round.
My Advice
Take some spray paint and paint out the areas where you’re considering putting your arena. Then ride in each of those areas for several weeks and each time you ride note the pros/cons you had for riding in that area. Was the ground muddy after it rained? Were the trees throwing deep shadows? Did you find lots of acorns or leaves in the corner? Was your horse distracted by what was going on around more in one area versus another? Is one area more comfortable to ride in than another? This is a great way to do a “test run” on your arena placement and note any issues you may have before they’re ever an issue.
Size
Get as big of an arena as you can afford. If you start with something small chances are you won’t make it larger at some point in the future so spend the extra money to get something you like right off the bat. Sure you still have to stay within the constraints of your property and geography but getting one extra stride in a line may mean the difference between tight turns or nice flowing turns. If you’re going to invest in an arena I wouldn’t recommend anything smaller than a small dressage arena (66″ x 132″) or a nothing smaller than a large round pen (60″) if you plan to do a perfect circle. Anything smaller than that and I wouldn’t bother calling it an outdoor arena because you won’t be able to use it like one and you may find that you don’t use it at all. If you’re planning to jump then consider at least a small jumping arena size (100″ x 200″) or as close to that size as you can possibly get.
My Advice
To get an idea of what the size arena will suit you mark the area with spray paint and then ride in it for several weeks. This will also help you decide if you want a square arena or a round arena, if you want a longer/wide arena or can make do with what you have. Try to do all of your normal exercises and riding practices in this area to see how it meets your needs and what changes may/may not be able to enhance your time there.
Base & Footing
The type of base and footing you get greatly depends on the soil quality and drainage in your area. The base is typically some kind of crushed stone or granite that will provide a solid, steady foundation for your footing. Sometimes your base can also be used as your footing and you can kill two birds with one stone. Footing then goes on top of the base to provide a cushion for the horse’s joints and a soft landing if (when, haha) you fall off. Since these vary so widely it’s hard for me to give you advice that will be pertinent to your location. What I can tell you is that you shouldn’t skimp on your base and make sure you use enough footing — too much is bad but too little and you’ll end up with your base coming up. No matter what you use you should thoroughly investigate what other people with arenas in your area are using and what pros/cons they have for using it. Also, consider putting in a lower fence panel to catch and keep your footing from washing away if your arena is on a hill or a substantial elevation and it will save you money down the road.
My Advice
Talk to other people who have arenas in your area to find out what kind of base and footing they’re using. Ask them what pros and cons they currently have with their choices and use that to make the best decision on the footing and base that works for your geographic location. Don’t skimp on your base and use enough footing to get good coverage but not so much that your horse’s have trouble moving around in it which is also damaging to their joints.
Quotes
So now that you have the basics down it’s time for the fun (and scary, yikes!) part. Get quotes. Lots of quotes. Lots and lots and lots of quotes. Man I can’t stress enough how important quotes are. I got seven, yes SEVEN, different quotes from different arena and grading and construction companies. The range of the quotes was both shocking and staggering, some of them were more than 200% higher than others. This will also give you an excellent opportunity to talk about your unique challenges of your property when it comes to your arena size and placement. Each and every contractor I talked to had a different idea on how and where to build the arena and what was the best place for them. Some of them flat out told me I couldn’t put the arena on the hill or that they’d never built an arena on a hill before. These are all excellent things to note and to take into consideration and each quote will give you a different perspective on your project and have you look at it in a way you hadn’t considered before.
My Advice
Get as many quotes as you can, even if they’re from a mom and pop place or someone you know you’re not going to choose to do the work. Spend time with each of them talking about their plan for your arena, the engineering challenges and issues you might face, where they think the best place for your arena is and so forth. This is a wonderful opportunity to test the waters and get some real, tangible feedback and at the same time assess your contractor’s competency and experience in building arenas and working with your type of terrain.
Contractors
Once you have all of your quotes it’s time to really look at the contractors you liked. Which quotes are higher than others and why? Do some have more experience, better reviews, better references, larger or smaller crews, more or less equipment? Of course the quotes you got will play a big part in who you choose to be your contractor but you should also do your due diligence and look up their BBB ratings and reviews, look for anything negative someone has said about them and what the ultimate outcome of that offense was. Take their experience and equipment and time into consideration as well. These will all have an effect on how quickly your arena is completed and ultimately how good an outcome you get.
My Advice
Do your homework on the contractors you like, get references and BBB ratings and reviews on their work. Get plenty of quotes but don’t just automatically accept the cheapest quote because it may end up costing you a lot more in the long run if your contractor doesn’t do it properly the first time around.
When To Build
This is another thing you don’t see much information on. It’s in your best interest to build your arena at a time when there won’t be a lot of rain and the ground is nice and firm. Everytime it rains you’ll have to slow down or stop work because the equipment starts sinking in or gets stuck. So pick a time of the year when the rainy season is past and you’ll have several weeks of nice dry weather.
My Advice
Rain = wet and bad and no work getting done, Sun = dry and good. For most people that will mean late spring or summer.
Installation
Once you’ve selected a contractor it’s time to SIGN A CONTRACT outlining all the details and specifications of your arena and when the installation will start. Make sure they’re aware of where the arena is going, how big it’s going to be, what kind and how much base/footing they’ll be adding, what kind of grade will be on the arena, how they’ll leave the construction site, any wires/electrical they should be aware of during construction and how much the total project is going to cost and what will happen if additional problems crop up, are they billed hourly or on a per issue basis?
My Advice
Get everything in writing and a signed contract (this one I can’t stress enough), make your payments to your contractor in a timely manner, oversee your contractors work and talk to them immediately if you notice a problem or mis-understandings or other issues arise — waiting until the last minute will cost you big time. If you can, have a clause added where your contractor will come back after a large rainfall and check for puddles or grading issues and include these grading fixes in your original contract price.
Extras
These things aren’t necessarily required but I wanted to take a minute to talk about them as well. For increased usability of your arena you should consider fencing it, adding lighting and a sound system and providing some kind of seating. You’ll also need to consider how you’ll maintain your arena once it’s completed to keep the footing in good condition. An arena drag is a huge must have to condition what you’ve just spent a small fortune installing.
My Advice
Enhance your arena for increased usability and keep up with arena maintenance to ensure you get long life and usage out of your new investment. Oh, and enjoy what all your hard work has brought you!!!


